Personal Vehicle Mileage - How to use Mileage Calculator
Step-by-Step Procedure
Personal Vehicle Mileage - How to use Mileage Calculator
Using the Concur Mileage Calculator is a time saver by using Google Maps for trip distances to generate car mileage reports quickly and accurately. It stores the map within the expense line, which eliminates having to attach pdfs of maps or mileage logs to your report. For multiple trips to the same location you can save even more time by using the copy feature. Here is a quick summary of how to use the Mileage Calculator.
Steps to Complete
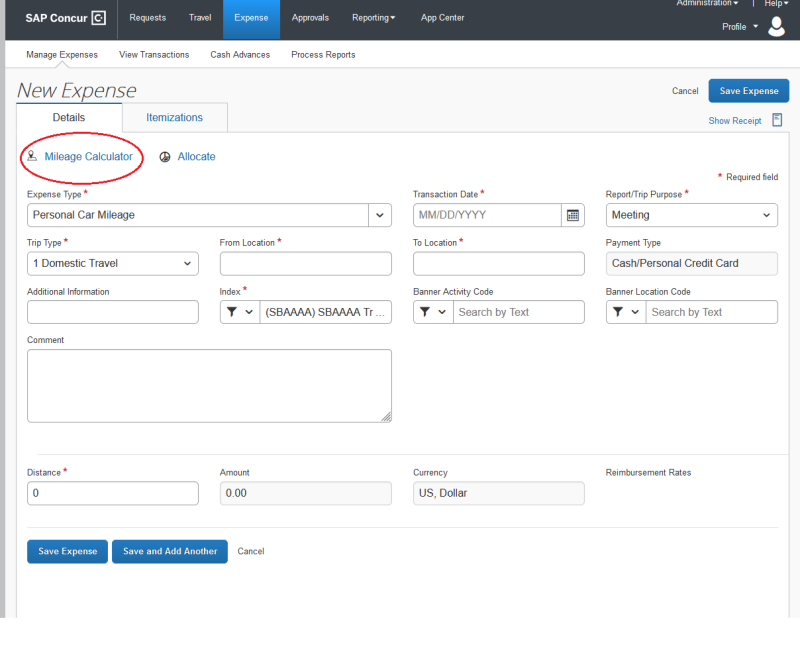
With the expense report open, click Add Expense, select Create New Expense, and then either begin to type the word Mileage into the available field or scroll to find the Expense Type Personal Card Mileage. Click Mileage Calculator at the top of the New Expense box.

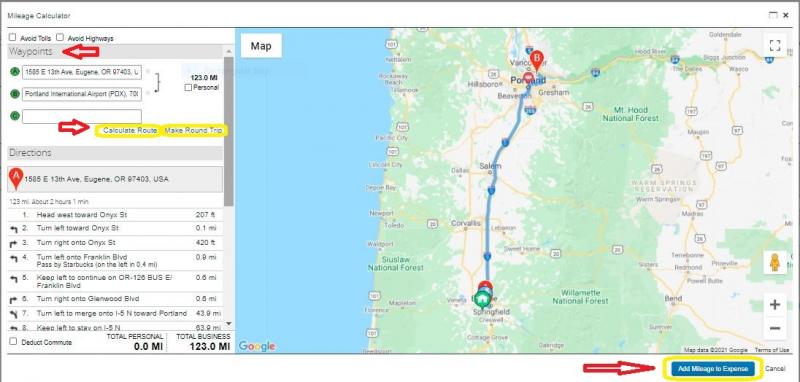
If stored in your Concur profile your home address will prefill in the first box, so remember to edit the first waypoint to either your home address or official workstation, whichever is closest to your destination.
Enter all the waypoints (destinations) that you drove to on that day. The mapping tool allows up to 26 waypoints to be entered. After entering the waypoints, click on "Calculate Route." If your return point is the same as your starting point, then click "Make Round Trip." Review your route for accuracy, then click on the blue button “Add mileage to Expense" and you will return to the view of your expense report.

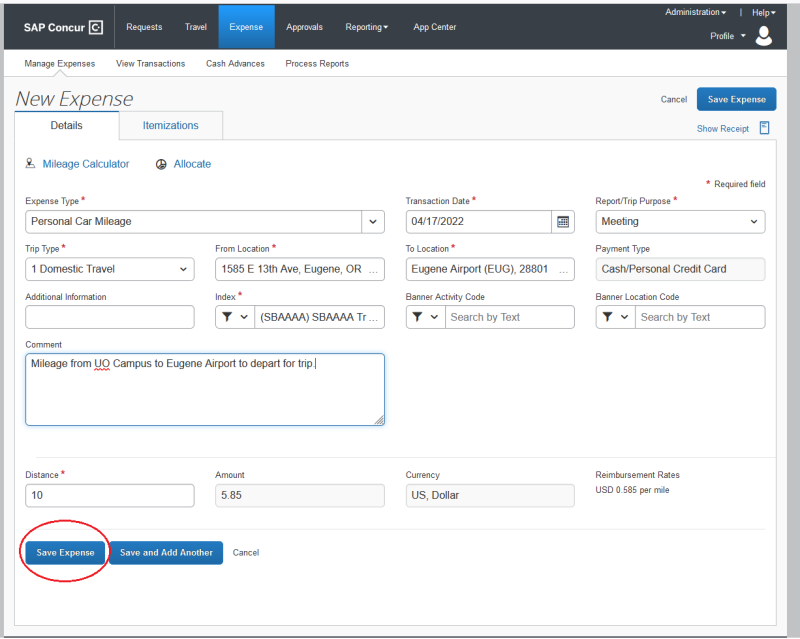
You will only need to enter in the transaction date, since the Mileage Calculator pre-populates the "to" and "from" location fields. Add other details if needed in the "Additional Information" field, then click “Save Expense” to add the mileage expense to the report.

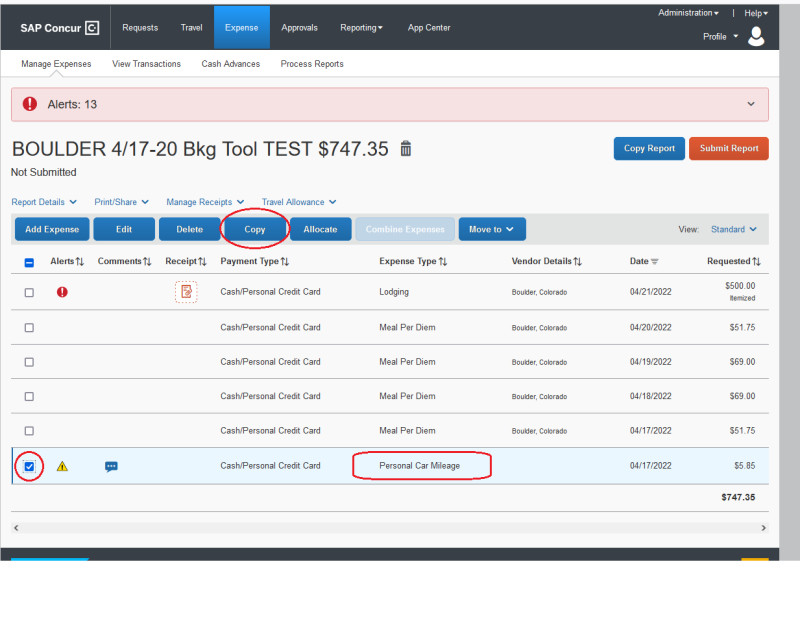
Click on the box located left of the “Personal Car Mileage” expense line you wish to copy. Then click on the blue “Copy” button. This will create another “Personal Car Mileage” expense line, with the same details except for the transaction date.
To change the date, click on the expense line which opens up the data fields on right-side of the screen. Click on transaction date and change the date, update needed details in the "Other Information" box, then click the "Save" button at the bottom of the screen.

